The processing tools I really like to bring in are the high dynamic range or HDR filters. These can truly make images more dynamic with great vibrancy and luminosity. Here are three examples from my recent trip to Chicago:


The HDR effects really work well outside on cloudy days. A little processing in Snapseed and you can produce dramatic images like these:


 |
| Add caption |
Yes, each was taken while driving- not recommended! And each was processed on my iPhone using Snapseed while driving- also not recommended. And then posted on social media sites- not recommended either. I just can't help myself sometimes!

So, here is how it is done. First, go to your app store and search Snapseed. The icon looks like this. I didn't realize Snapseed is a Google product until now!

I have Snapseed on both my iPhone 7 and iPad.

Follow the steps to import a photograph into Snapseed.
I took this one a few weeks ago on a very foggy morning. I have a small pond near my backyard. The street light went out the second after I took this photograph. I knew it was a good capture but it would look even better with a little Snapseed magic.
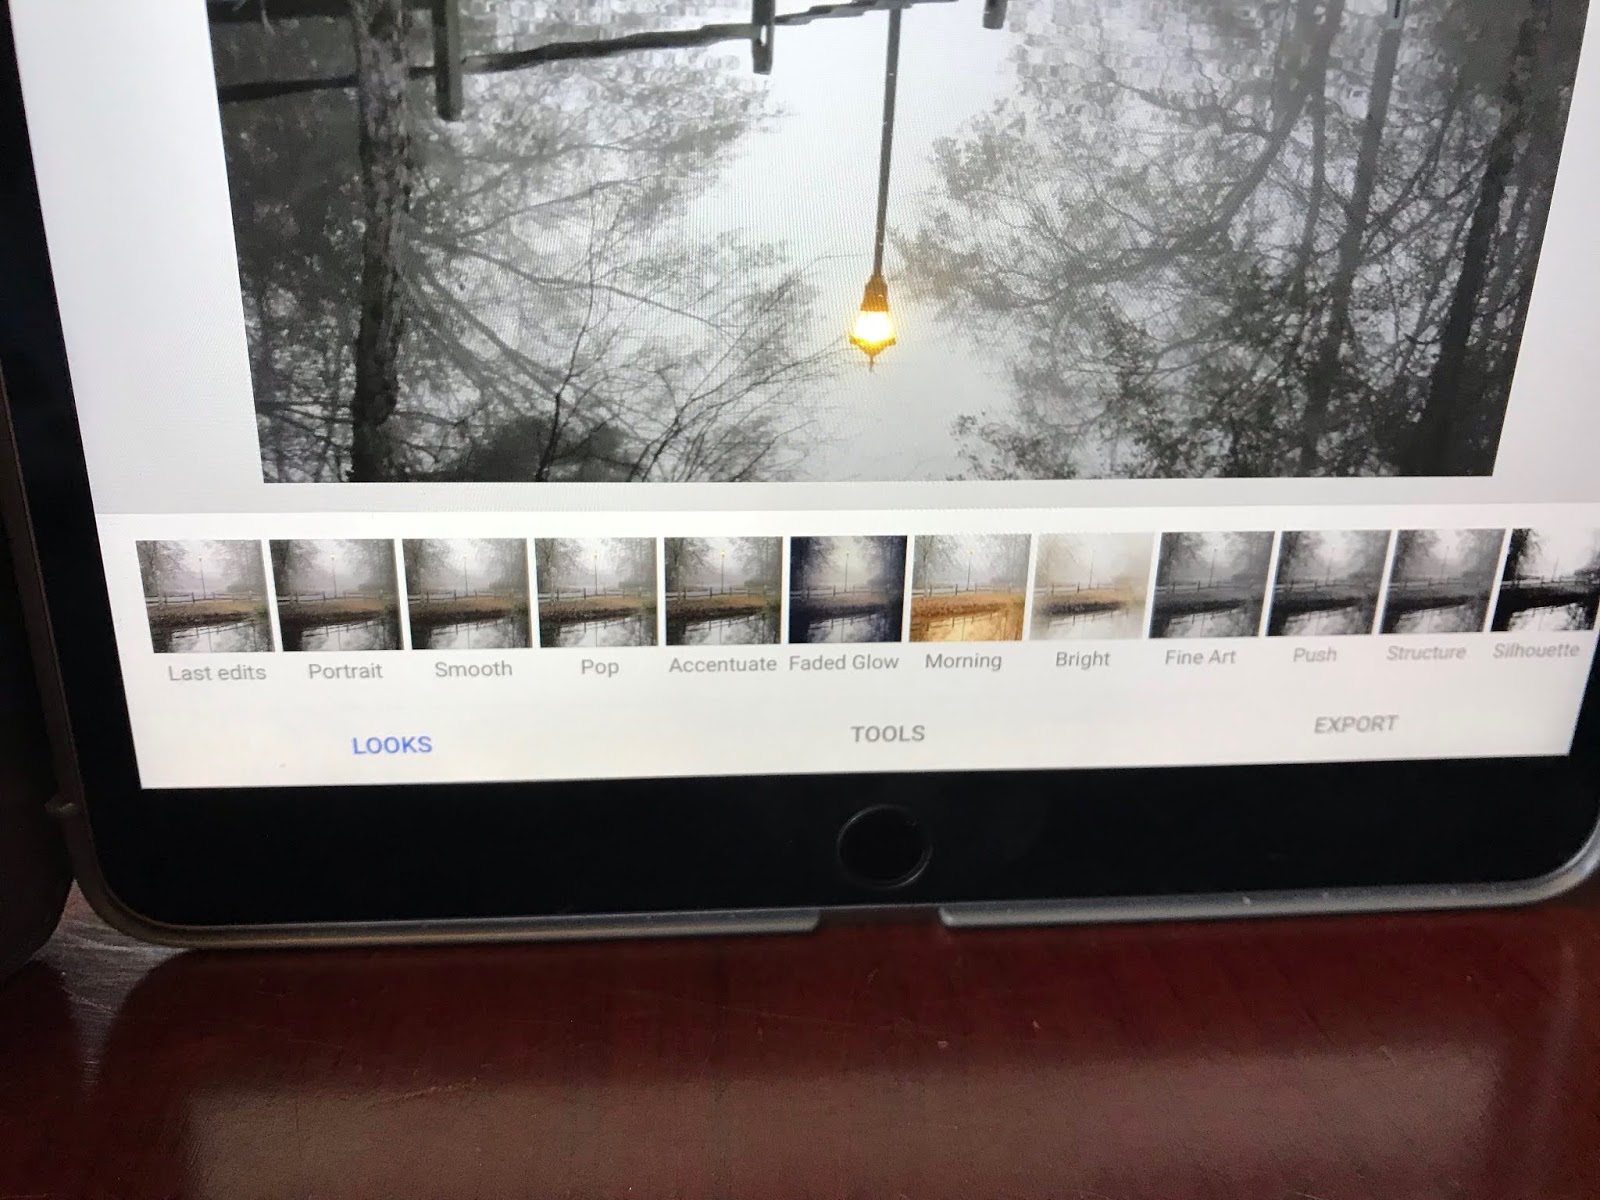
The two major tool categories that are seen at the bottom of this shot are Looks and Tools.
The Looks options are seen. They include, from left to right Portrait, Smooth, Pop, etc.

Accentuate is a good filter as it does a few of the other effects including some HDR.

If you like the changes click the check on the right bottom of the screen. Or hit the x on the left to discard and try something else.

Click on Tools and this screen opens. The tools include cropping, rotating and tuning your image. You can also put a frame around it and add text.


To play with the HDR Scape tool, tap this icon.

Use your finger to slide across the screen to adjust the HDR filter strength. The higher the number the more dynamic becomes the HDR filter.

I pushed the HDR strength to 100 to see the full effect- and I like it!

When happy with the image, next tap Export.

In this screen, hit Save a copy. Don't just do Save. You may want to keep your original image so Save a copy keeps the original and also the one you just processed.

You will get a Successfully saved cue. The new picture will be in your devices photo folder.


Here you see a side-by-side comparison before and after Snapseed action.


I am assigning my SC State students to create a blog post showing two photographs before and after Snapseed processing. They should explain the steps involved and have appropriate embedded links and label words at the end as I have in this post. I look forward to seeing their creations!
No comments:
Post a Comment